Saturday, August 26, 2023

Understanding DPI for Printing - How Resolution Affects Print Quality

Have you ever wondered why your printed images don't look as sharp as they do on your computer screen? The answer lies in understanding DPI for printing, or dots per inch, and its impact on print quality. In this article, we'll delve into the fascinating world of DPI, debunk common misconceptions, and provide practical guidelines for optimizing your printing projects.

Short DPI Summary

  • DPI is essential for successful printing projects and should be considered alongside image resolution, file formats, and your printer type.

  • For marketing material print files, you should aim for a minimum of 300 DPI.

  • Image resolution, size, file format (lossless vs. lossy), and printer types all affect DPI & print quality.

  • Understanding the impact of these factors on DPI can help achieve optimal print quality without loss of detail or clarity.

Understanding DPI: The Basics
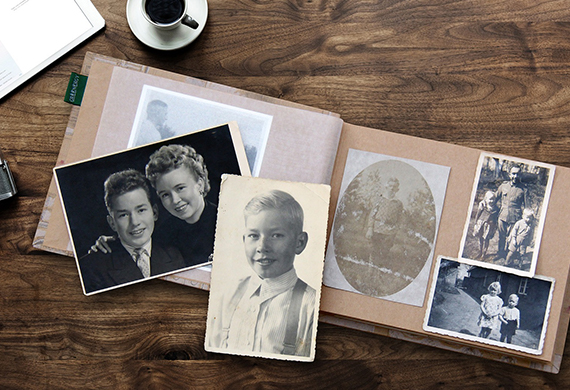
printed image with high resolution and good print quality

DPI, or dots per inch, is a crucial aspect of printing that determines the sharpness and detail of the final output. It's the measure of the density of dots in an image, which consequently affects its resolution and quality. But DPI is not the only factor that influences print quality – printer resolution, file formats, and printer types all play a role.

So, why is it important to understand DPI and its relationship with other factors? To achieve the best possible print results, especially when dealing with low-resolution images, it's essential to have a solid grasp of DPI and its implications.

Definition of DPI

DPI stands for dots per inch, a measurement used to assess the clarity and detail of an image on paper or the sensitivity of a computer mouse. It is a significant factor when printing and designing, as it determines the resolution or quality of the image. A low DPI value creates blurry images when printed.

The importance of DPI in printing cannot be overstated. It is a measure of the dots density in an image. Selecting the right DPI value is vital for the success of any print project, as higher DPI values result in better print quality, while lower DPI values can lead to pixelated or blurry prints.

DPI vs. PPI

DPI and PPI are often used interchangeably, but the two have a key difference. DPI, or dots per inch, refers to the number of printed dots within one inch of an image printed by a printer. On the other hand, PPI, or Pixels Per Inch, denotes the number of pixels within one inch of an image displayed on a digital screen. DPI and PPI are vital when working with medium-resolution images to ensure optimal print quality.

The DPI and PPI values necessary for various print applications differ depending on the size and type of the print. For instance, marketing materials usually necessitate higher DPI and PPI values than large-format prints. Ensuring the correct DPI and PPI values are used can help prevent blurry images in the final print.

Importance of DPI in Printing

DPI is critical in printing as it determines the sharpness and detail of the final printed product. Generally, increased DPI yields improved quality. But it's not just about the DPI value; factors such as image resolution and size, file formats, and printer types contribute to the final print quality. For instance, converting RGB images to CMYK is essential for printing on a four-color printing press, as CMYK is the color space used in printing.

Resolution, or the number of pixels in an image, directly influences the sharpness and detail of the printed product. By understanding the importance of DPI and other factors, you can achieve the best possible print results for your projects.

Factors Affecting DPI and Print Quality

digital camera taking a high resolution image

To achieve the best possible print quality, it's essential to understand the factors that influence DPI and print quality. Image resolution and image size are two of the most important factors that influence print quality dpi. In this section, we'll discuss the impact of image resolution and size, file formats, and printer types on DPI and print quality.

Image Resolution and Size

Image resolution and size play a significant role in determining the final DPI and print quality. Image resolution is defined as the number of pixels in an image and has a direct effect on the print quality. Images with higher resolution will display more detail and will produce a higher quality print than images with lower resolution.

When working with images, it's important to consider the appropriate DPI for optimal print quality. Remember that increasing the size of an image does not increase its resolution. In fact, enlarging an image beyond its original resolution can result in pixelation, which leads to a loss of detail and quality in the final print.

File Formats: Lossless vs. Lossy

File formats play a crucial role in determining print quality. There are two primary file formats: lossless and lossy. Lossless formats, such as TIFF and PNG, retain all image data and yield a higher-quality print. Lossy formats, including GIF or JPEG files, compress the image data, resulting in a lower-quality print.

It's essential to choose the right file format for your printing needs. Lossless formats are recommended for printing to maintain color quality and contrast, while lossy formats may result in lower-quality prints. Keep in mind that smaller file sizes are beneficial for web use but may not be suitable for high-quality printing.

Printer Types: Inkjet vs. Laser

Printer types, such as inkjet and laser, can affect the final print quality. Inkjet printers are versatile and can produce quality prints with a wide range of DPI settings, making them suitable for various printing projects. However, the ink used in inkjet printers may cause seeping, which can reduce the dots per inch of a printed work.

On the other hand, laser printers are known for their speed and precision, making them suitable for high-volume printing with consistent DPI. Laser printers use a toner that does not seep into the paper, often resulting in a clearer image.

Likewise, professional printers ensure accurate DPI and color consistency. By carefully considering the type of printer best suited for your printing needs, you can achieve the best possible print quality.

DPI Guidelines for Different Print Applications
marketing material with high resolution and good print quality

In this section, we'll explore the DPI guidelines for various print applications, such as marketing materials, large-format prints, and photographs. By following these guidelines, you can ensure that your prints will look sharp and professional.

Marketing Materials

Marketing materials, such as brochures, flyers, and business cards, typically require a DPI of 150-300 for good print quality. The higher the DPI, the better the print quality will be, especially for small fonts, intricate barcodes, graphics, and photos. For smaller items or intricate design and detailed prints, 300 DPI is strongly advised.

Large-Format Prints

Large-format prints, such as posters, banners, and billboards, may require a higher DPI to maintain image quality at larger sizes. The DPI guidelines for large-format prints usually range from 100 to 300 DPI, with 300 DPI being the preferred resolution for optimal clarity.

When creating large-format prints, it's crucial to consider the DPI requirements and how they will affect the final print quality. By selecting the appropriate DPI for your large-format prints, you can ensure that your designs are impactful and maintain their quality, even when viewed from a distance.

Photographs

Photographs generally require a higher DPI for optimal print quality, often 300 DPI or more. The higher the DPI, the better the print quality will be, especially for images with fine details and textures. For professional magazine images or exhibition-quality artwork, a DPI of 600 or higher may be necessary.

By understanding the DPI requirements for photographs and selecting the appropriate DPI, your printed photos will be sharp, vibrant, and true to the original image. High-quality photo prints can make a lasting impression, serve as cherished keepsakes, or provide stunning artwork for your home or office.

Tips for Optimizing DPI and Image Resolution
scanned image with high resolution and good print quality

In this section, we'll provide practical tips for optimizing DPI and image resolution. By following these guidelines, you can achieve the best possible print quality for your projects, whether you're printing marketing materials, large-format prints, or photographs.

Scanning Techniques

Proper scanning techniques can help maintain high DPI and image quality for printing. When scanning images, be sure to choose the appropriate resolution or dots per inch (dpi) for your project. Start with high-quality images and select the appropriate file type, such as JPEG or PNG.

Preserving color and sharpness is essential, especially when scanning images that will be edited. To do so, saving the scanned images as lossless TIF or EPS files is advisable. Following these scanning techniques ensures that your printed images maintain their quality and detail, even when enlarged or printed at high resolutions.

Image Editing

Image editing software can be used to adjust DPI and resolution, but care must be taken not to degrade image quality. When resizing images, it's important to use TIF or EPS files, and consider the appropriate DPI.

Remember that increasing the size of an image does not increase its resolution. In fact, enlarging an image beyond its original resolution can result in pixelation, which leads to a loss of detail and quality in the final print.

When selecting a file type, such as JPEG or PNG, consider the content and quality requirements of the image. Additionally, so long as no further scaling up is done, you can utilize compression techniques to reduce the file size without significantly impacting the image quality.

Following these image editing tips ensures that your printed images maintain their quality and detail, even when resized or printed at high resolutions.

File Conversion: RGB to CMYK
visual representation of the RGB to CMYK conversion process with emphasis on dpi for printing

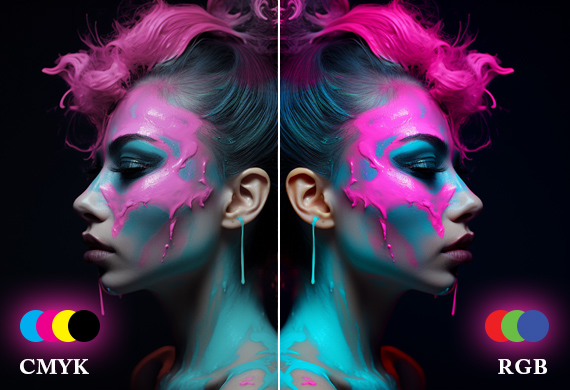
Converting digital images from RGB to CMYK is essential for accurate color reproduction in printing. RGB, or red, green, and blue, is the color space used for digital images displayed on screens. CMYK, or cyan, magenta, yellow, and key (black), is the color space used for printing on a four-color printing press.

To ensure optimal print quality, converting images from RGB to CMYK before printing is recommended. RGB and CMYK color profiles are completely different. This conversion ensures that colors are accurately reproduced on the printed page and helps to prevent color shifts or inaccuracies. By following this file conversion technique, you can achieve the best possible print quality for your projects.

Note: Another popular way to ensure color matching when printing is using pantone colors. The Pantone system is a collection of over 1100 different colors that are all labelled. When you find the specific color that's just right for your project, it has a name and a number assigned to it. Printers that use this system read these numbers and are able to recreate the color.

Common DPI Misconceptions and Pitfalls

In this section, we'll address common misconceptions and pitfalls related to DPI, including pixelation, overcompensation, and misunderstanding DPI values. By understanding these misconceptions and pitfalls you can avoid common mistakes.

Pixelation

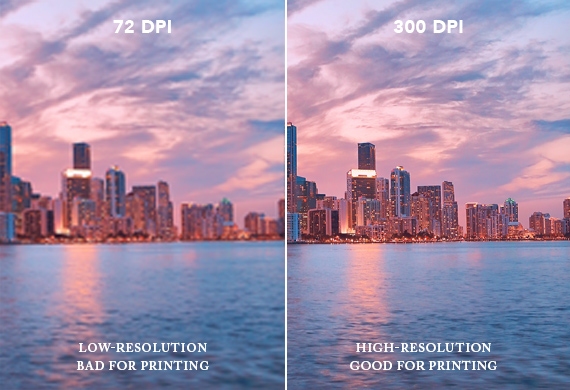
Pixelation occurs when an image is displayed or printed at an inadequate resolution, causing individual pixels to become visible and resulting in a blocky or blurry appearance. This visual artifact is often seen in low-resolution or improperly rendered images, where the image is enlarged beyond its original resolution, leading to a degradation of detail and quality.
printed page with low resolution and poor print quality

To avoid pixelation, it's essential to work with the proper file types, high-resolution images, and ensure that they are resized appropriately for printing. By maintaining the correct resolution and DPI settings, you can achieve sharp, detailed prints without the unwanted effects of pixelation.

Overcompensation

Overcompensation refers to the practice of increasing DPI in software without improving the actual image quality. This can lead to a lack of detail and clarity in the final print, as the software merely alters the size of the dot without increasing the resolution of the image.

To avoid overcompensation, it's essential to work with high-resolution images and ensure that they are resized appropriately for printing. Additionally, be aware of the actual resolution of your images. Avoid lower-resolution images, and refrain from artificially increasing DPI values that may result in poor print quality. Considering what royalty-free images cost, it's a wise investment to opt for high-quality images and avoid low-resolution image usage to ensure optimal results.

Misunderstanding DPI Values

Misunderstanding DPI values can lead to poor print quality or unnecessarily large file sizes. It's a common misconception that higher DPI values always lead to improved print quality. However, the DPI value is just one of the many factors that affect print quality, and simply increasing DPI in a software may not result in better prints.

To avoid misunderstandings and pitfalls related to DPI values, it's crucial to have a solid grasp of DPI, its relationship with other factors, and its impact on print quality.

How to Choose the Right Printer for Your DPI Needs
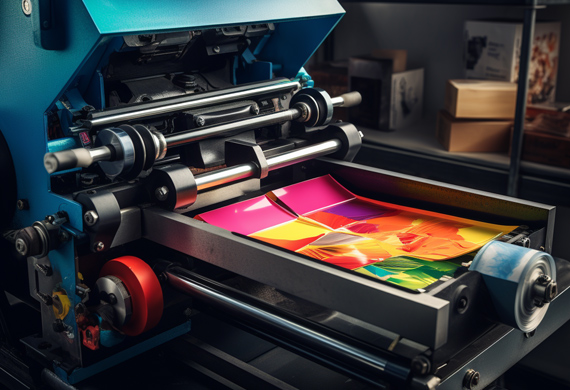
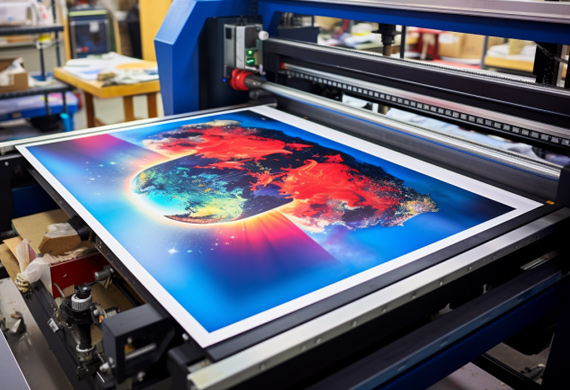
printer printing a high resolution image

Choosing the right printer for your DPI needs is essential for achieving optimal print quality. In this section, we'll discuss factors to consider when choosing the right printer for your needs. These include considering inkjet or laser printers, and selecting the best printer for your specific job.

Inkjet Printers

Inkjet printers are versatile and can produce high-quality prints with a wide range of DPI settings, making them suitable for various printing projects. These printers utilize liquid ink to generate printed documents and are generally more affordable to acquire. However, the ink used in inkjet printers may cause seeping, which can reduce the dots per inch of a printed work.

When selecting an inkjet printer, consider factors such as print volume, desired DPI, and budget. Inkjet printers are affordable and work for printing high-resolution images, making them a popular choice for independent photographers and graphic designers.

Laser Printers

Laser printers are renowned for their speed and precision, making them suitable for high-volume printing with consistent DPI. These printers use a toner that does not seep into the paper, resulting in a clearer image. Laser printers may have a higher initial cost but usually have a lower overall cost of ownership, making them a popular choice for businesses and offices.

Consider factors such as print volume, desired DPI, and budget when selecting a laser printer. Laser printers are ideal for printing text and graphics, making them a popular choice for office documents and marketing materials.

Selecting the Best Printer for Your Needs

When selecting a printer to meet your DPI requirements, factors to consider include the type of project, resolution, cost, size, and ink or toner type. Basic printers typically provide a sufficient resolution for most documents, while photo printers are designed to produce high-quality prints.

By carefully considering the type of printer best suited for your printing needs, you can achieve the best possible print quality and DPI. Whether you're printing marketing materials, large-format prints, or photographs, understanding DPI and selecting the right printer will ensure that your projects look stunning and professional.

Summary

In conclusion, understanding DPI and its impact on print quality is crucial for the success of your printing projects. From differentiating between DPI and PPI to selecting the right printer and optimizing image resolution, this article has provided practical guidelines to help you achieve the best possible print quality. Avoiding DPI misconceptions and your printed materials will be sharp, visually appealing, and make a lasting impression on your target audience.

Frequently Asked Questions

Is 300 or 600 DPI better for print?

For prints, 600 DPI offers higher resolution and thus better quality results, while 300 DPI is sufficient and works for many print projects.

Should I print 72 or 300 DPI?

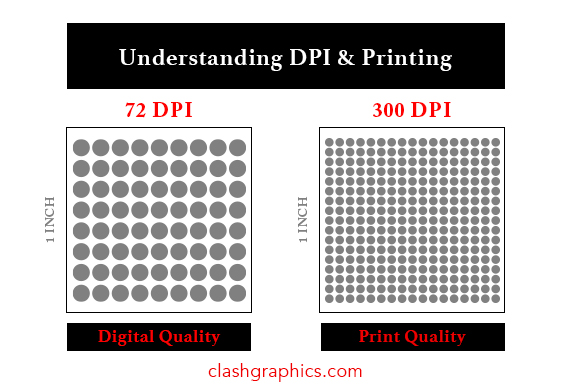
For the best print quality, you should print your image at 300 DPI for crisp and clear results.

A lower resolution of 72 PPI will appear pixelated and blurry.

What is the difference between DPI and PPI?

DPI is a measure of printed dots per inch, while PPI is a measure of pixels per inch, making them useful for different types of images.

What factors affect DPI and print quality?

DPI and print quality are largely determined by the resolution of the image, the file format used, and the type of printer employed.

Different printers have different capabilities, so it's important to understand their differences. For example, inkjet printers are capable of producing higher-resolution prints than laser printers. Additionally, the type of paper used can also affect the print quality.

How can I optimize DPI and image resolution?

Optimizing DPI and image resolution can be achieved by employing proper scanning techniques, using image editing applications, and converting RGB files to CMYK.

Clash Graphics Print Shop Atlanta Flyer Printing

2233 Peachtree Rd NE Ste 202 AtlantaGA 30309
(678) 235-3464

To view the original version on Clash Graphics, visit: https://www.clashgraphics.com/printing-tips/understanding-dpi-for-printing-how-resolution-affects-print-quality/

Monday, July 31, 2023

Standard Poster Sizes Guide

Are you feeling overwhelmed by your choices of poster sizes and printing options? Whether creating a captivating movie poster or an informative academic presentation, selecting the right size and printing method is essential for ensuring your message is effectively conveyed. Fear not; this guide to standard poster sizes will help you confidently navigate the world of poster printing.

In this comprehensive article, we'll explore standard poster sizes, delve into custom sizes for specific purposes, discuss the importance of selecting the right paper and printing method, share design tips for effective posters, and help you choose between DIY printing and professional services. Let's embark on this journey to create captivating posters!

a poster with different sizes and dimensions

Short Summary - Standard Poster Sizes

  • Familiarize yourself with standard poster sizes to plan and benefit from the cost-effectiveness and availability of the best options for your project.

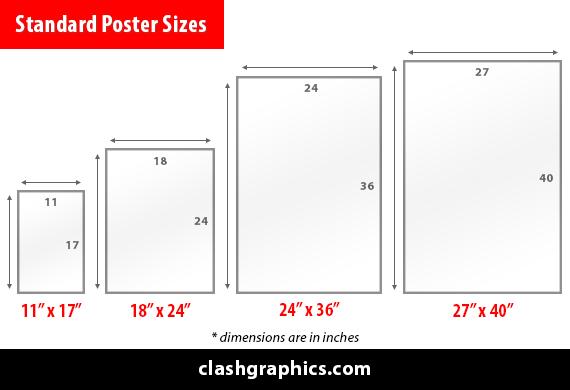
  • The most frequently used poster sizes are 11x17, 18x24, 24x36, and 27x40; these standard sizes can produce nearly any poster you can imagine.

  • Consider the text size and readability; also think of the balance between text, images & white space when designing a medium-sized poster or large poster.

  • Select the right paper and printing method considering the weight, cost, lifespan, and acid-free status. Also, consider digital vs. offset printing when deciding your desired poster quality & budget.

The Most Common Poster Sizes

Understanding the standard poster sizes - small (11" x 17"), medium (18" x 24"), and large (24" x 36" and 27" x 40") - can help you choose the right size for your specific needs. These four poster dimensions will work for nearly any project, so consider them for your next poster printing project.

Standard poster sizes offer numerous benefits, such as the availability of paper rolls, multiple frame options, and print enlargements tailored to these standard sizes. Choosing a standard poster makes printing them cost-effective and readily accessible through online or local poster printing services.

Now, let's dive deeper into standard poster sizes and tips for creating your own poster in small, medium, and large sizes.

11" x 17" - Small Posters

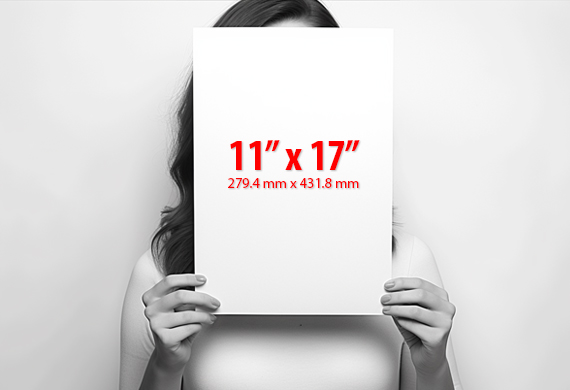
woman holding an 11 x 17 inch small poster

Small posters are often 11 x 17 inches. This standard size is ideal for store windows, restaurants, bathrooms, bulletin boards, and interior displays in high-traffic areas. Known as "bulletin posters," these are the right size for event advertising, indoor notices, around lounges, waiting rooms, and bathrooms.

Their compact size allows them to fit in tight spaces without consuming much wall space, making them perfect for displaying on community bulletin boards or alongside other posters in retail stores. Small posters are placed on doors and street lights for outdoor use, which suits the 11" x 17" poster well.

When designing a small poster, it's crucial to employ large, bold fonts to ensure readability, concise copy, and visually arresting visuals. A minimalist design and simple messaging is the perfect approach to grab attention and convey your message effectively at this size.

Examples of creative uses for mini-posters include music and movie posters, advertisements, personal wall art, promoting events, smaller window advertisements, and subway posters.

18" x 24" - Medium Posters

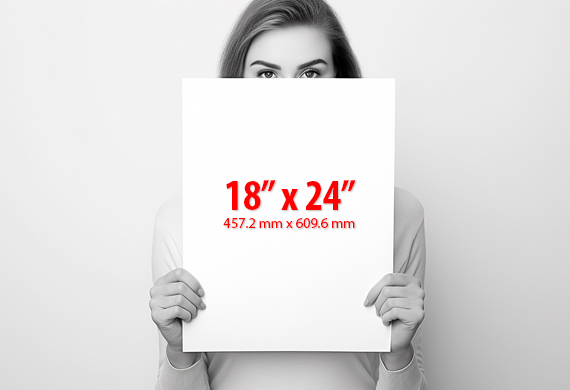
woman holding 18 x 24 medium sized posters of the standard poster sizes

Medium posters, measuring 18 x 24 inches, are one of the most requested poster sizes. They offer slightly more space than smaller posters for larger images and minimal text. This size provides ample space for promoting events, festivals, and concerts and is perfect for retail advertisements and home decor.

These versatile standard-size posters can be used indoors or outdoors for various purposes, such as medical posters, retail ads, and in bus stop or subway displays. These posters are often used in offices, clinics, and larger bulletin boards.

When designing a medium poster, it's important to consider the proportion of text and images. This poster has a 3:4 aspect ratio, and with more space than a small poster, you have extra room for content. Here are additional tips for creating a compelling and eye-catching medium poster for your next project:

  • Strike the right balance between text, images, and white space

  • Ensure that your text and images are legible and visually appealing

  • Use a suggested minimum height of twelve points for text on a medium poster

These tips help you create a medium-sized poster that grabs attention and effectively communicates your message.

24" x 36" - Large Posters

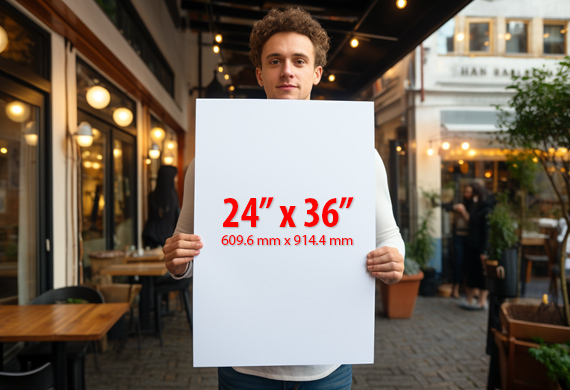
man holding a 24 x 36 inch large format posters

The large poster dimensions are typically 24 x 36 inches and are ideal in busy areas. It is the most popular large poster and is commonly used for commercial advertising due to its size and ability to grab attention. As a go-to in high-traffic areas, this poster is perfect for trade shows and exhibits, and retail stores often print their posters in 24" x 36" poster dimensions.

This poster has a 2:3 aspect ratio, enabling abundant options if you need your poster framed. In addition, the large poster dimensions offer ample space for incorporating additional details and creativity into your poster design. With the benefit of a larger canvas, you can include intricate graphics and designs to make the poster more eye-catching.

Large-format poster printing on high-quality materials, such as polyester fabric, can ensure the longevity and vibrancy of your large-format posters, whether displayed in retail stores, outdoor venues, or advertising locations.

27" x 40" - Large Movie Posters

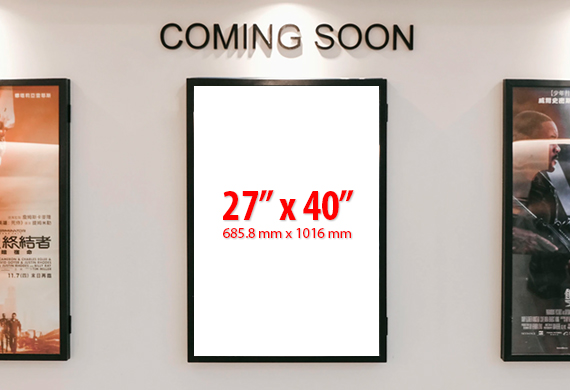
a 27 x 40 inch standard movie poster size

Measuring 27 x 40 inches, this large poster is the last of the most-common standard poster sizes. The 27" x 40" is often seen announcing and advertising upcoming movies. These iconic film posters are frequently seen in theaters and malls and framed as signs or billboard posters inside displays.

In addition to being the standard movie poster size, this poster is also commonly used as bus stop ads due to its ability to be seen from a distance. While framing the 27" x 40" poster might not be as straightforward or budget-friendly, it remains an excellent choice for those seeking a very large standard poster.

This movie poster provides enough space for high-resolution images, graphics, and sizable text. When designing, take advantage of the size, and incorporate vivid graphics, but use the white space properly to make it easily legible and ensure your messaging is seen.

Custom Poster Sizes

While standard poster sizes are versatile and widely used, custom poster sizes cater to specific purposes, such as concert promotions, advertising, and academic presentations. In addition to the standard sizes, posters can be printed in many other dimensions and sizes to meet your needs.

Standard Poster Sizes

Size: Inches

Size: Millimeters

Size: Centimeters

Printing Methods

Other Names

8.5 x 11 in. 215.9 x 279.4 mm. 21.59 x 27.94 cm Digital, Inkjet, Offset ANSI-A, Letter
11 x 17 in. 279.4 x 431.8 mm. 27.94 x 43.18 cm. Digital, Inkjet, Offset ANSI-B, Ledger, Tabloid
12 x 18 in. 304.8 x 457.2 mm. 30.48 x 45.72 cm. Digital, Inkjet, Offset Mini-Poster
16 x 20 in. 406.4 x 508.0 mm. 40.64 x 50.80 cm. Inkjet, Offset Portrait Pictures
18 x 24 in. 457.2 x 609.6 mm. 45.72 x 60.96 cm. Inkjet, Offset Medium Poster, Architectural C, 1/2 size
24 x 36 in. 609.6 x 914.4 mm. 60.96 x 91.44 cm. Inkjet, Offset Large Poster, Architectural D
27 x 39 in. 685.8 x 990.6 mm. 68.58 x 99.06 cm. Inkjet, Offset One Sheet Movie Poster (bulk)
27 x 40 in. 685.8 x 1016.0 mm. 68.58 x 101.60 cm. Inkjet One Sheet Movie Poster
48 x 36 in. 1219.2 x 914.4 mm. 121.92 x 91.44 cm. Inkjet Research Poster, Academic Poster
40 x 60 in. 1016.0 x 1524.0 mm. 101.60 x 152.40 cm. Inkjet Bus Stop, Subway Poster

As seen above, custom posters can range in size. Let's explore some unique custom poster applications in detail.

Concert and Band Posters

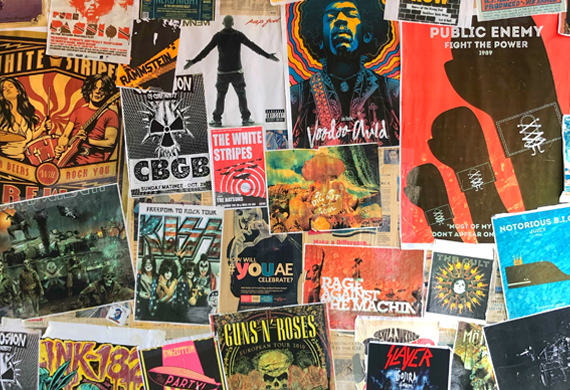
band concert poster with custom size and design

Concert and band posters come in various sizes, ranging from handbills and flyers to large posters. Handbills typically measure 8.5" x 10" or 8.5" x 5", while large flyers and small letter-sized posters used for promotional purposes outside the venue measure 8.5" x 11". These posters are designed to grab attention and effectively promote events regardless of size.

The most requested size for band posters is 11" x 17" to 24" x 36". One cost-effective large-format advertising medium for concerts and events is wheatpasting posters, frequently observed adorning walls and fences repetitively. These posters allow bands and event organizers to reach a wider audience without breaking the bank.

Academic and Research Posters

Academic and research posters typically measure 48" x 36" and are used to present research findings or academic projects in a visually appealing and informative manner. These posters balance visuals with text, providing an overview of the research project and relevant commentary regarding the discoveries made throughout the process.

Inkjet printing is the most commonly used method for printing academic posters because it produces high-quality images and text. When designing an academic or research poster, it's essential to consider the balance between text and visuals, ensuring the information is presented clearly, and easy for the viewer to consume.

Selecting the Right Paper and Printing Method

Choosing the right paper and printing method is crucial for creating long-lasting, high-quality posters. Factors to consider include the poster's appropriate weight, cost, and desired lifespan. Paper weight is measured in grams per square meter (GSM), and it is suggested that the minimum weight for poster paper should be 90 GSM or g/m2 (60 pounds). If you have a decent budget, choose a heavier paper weight (120-170 GSM). In addition to giving your poster a more luxurious feel, it will make it more durable and longer lasting.

a poster printed on acid-free paper

Let's look at two essential aspects of poster printing: using acid-free paper stock and choosing between digital and offset printing.

Acid-Free Paper

Acid-free paper has a neutral or basic pH, meaning it is devoid of sulfur and lignin, which can cause discoloration if not eliminated. Printing posters on acid-free paper prevents yellowing over time, ensuring the color of your poster remains vibrant and intact.

While acid-free paper may be slightly more expensive than standard printer paper, the investment is well worth it to preserve your poster's appearance long-term. This is especially important for posters displayed in public areas or those with sentimental value, as the colors and quality of the printed poster will remain intact for years to come.

Digital vs. Offset Printing

Digital and offset printing methods offer different advantages, depending on your poster's size and purpose. Digital printing is a more efficient and less labor-intensive process that is ideal for short-run production (smaller quantity) and when a rapid turnaround is necessary. On the other hand, offset printing provides higher-quality results and is more suitable for large-run production (larger quantity) and when a higher quality is required.

When deciding between digital and offset printing, consider factors such as the number of posters needed, the desired quality, and your budget. For small-scale projects or when time is of the essence, digital printing may be the best option. However, if you require a large number of posters or desire the highest possible quality, offset printing will be the better choice.

Design Tips for Effective Posters

The intent and goal of creating a poster is to grab attention and convey a message or information quickly. Good design accomplishes this, and effective poster design incorporates the following to do so:

  • Minimalism

  • Visual hierarchy

  • Typography

  • Contrast

By using these design elements strategically, you can ensure that your poster captures the attention of your target audience and effectively conveys your message. Let's explore these design principles in more detail.

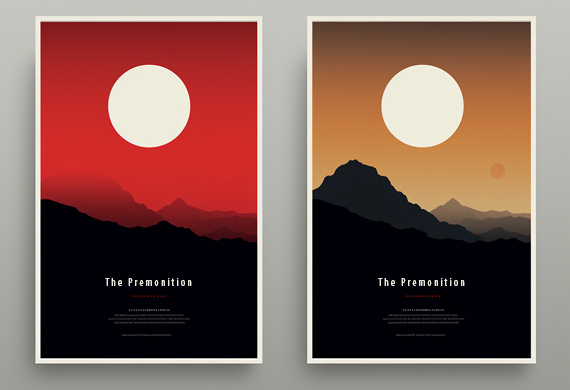
a poster with minimalistic design and visual hierarchy

Minimalism and Visual Hierarchy

Minimalism in design emphasizes simplicity, functionality, and elegance. Using a restricted color palette, basic forms, and negative space, you can create a straightforward and practical design highlighting important elements and attracting the viewer's attention. Minimalism is particularly relevant for small and medium-sized posters, as a high concentration of text can render the poster challenging to read and ultimately ignored.

On the other hand, visual hierarchy refers to guiding the viewer's gaze through the poster using eye-catching graphics and text. You can create a clear and ordered poster that effectively conveys your message by arranging design elements to emphasize and highlight the most important information.

Typography and Contrast

Typography is the art and technique of arranging letters and text to make written language legible, readable, and aesthetically pleasing when displayed. Bold typography can be employed as a singular image on posters, creating an eye-catching focal point that draws the viewer in.

Contrast, on the other hand, can be employed to create visual interest and direct attention to certain aspects of a poster. By utilizing different colors, sizes, and font weights, you can increase the readability of your text and ensure that your poster effectively communicates its intended message.

Combining typography and contrast can create visually appealing designs that enhance your poster's aesthetics and effectiveness.

Printing Your Poster: DIY or Professional Services?

poster printed with DIY or professional services

Deciding between DIY printing and professional services depends on quality, cost, and convenience. While DIY printing can be more affordable, it may result in lower-quality posters, especially for large sizes. On the other hand, professional printing services offer higher quality and a wider range of options, ensuring your poster looks its best.

Let's weigh the pros and cons of each option.

Pros and Cons of DIY Printing

DIY printing can be cost-efficient and require less time and effort than a professional printing company. This may be an attractive option for those on a tight budget or who need a small number of posters printed quickly for their poster printing project. However, the quality of the print may not be as high as that of professional printing, which could impact your poster's overall effectiveness and appearance.

In addition, DIY printing may be limited in terms of the available printing methods and materials, which could affect the longevity and vibrancy of your poster. If you're considering DIY printing, weighing the potential savings against the potential drawbacks in terms of quality and durability is essential.

Benefits of Professional Printing Services

Professional printing services provide higher quality prints and a broader selection of options than DIY printing. They use higher-quality materials and have access to more advanced printing technology, ensuring that your poster looks its best. Professional printing services also offer various finishing options, including lamination, mounting, and framing, which can help protect your poster and make it look more professional.

In conclusion, a professional printing company can provide superior quality, a more comprehensive selection of finishing options, and printing services that include:

  • Higher quality materials

  • Access to more advanced printing technology

  • A selection of finishing options, such as lamination, mounting, and framing - to safeguard and make your poster appear more professional

Summary

Throughout this reference of standard poster sizes, we've explored the dimensions and purposes of small, medium, and large posters and specific applications for custom-size poster projects. We delved into the importance of selecting the right paper and printing method. Lastly, we shared design tips for creating compelling, easy-to-read, and eye-catching posters.

By understanding the nuances of poster sizes, design principles, and printing methods, you can confidently create captivating posters that effectively convey your message and leave a lasting impression. Now go forth and unleash your creativity, and produce a captivating poster!

Frequently Asked Questions

Is 18x24 a standard poster size?

Yes, 18x24 is a standard poster size as well as the most popular medium poster size.

Is 24x36 a standard poster size?

Yes, 24x36 is a standard poster size, often used at trade shows, exhibits, and to display home decor/art.

What is the standard poster size ratio?

The most common poster size ratios are 2:3 and 4:3. Popular sizes include 18" x 24", 24" x 36" and 27" x 40".

16:9 is also used for widescreen digital posters, with 48" x 36" being the most common size for print posters.

What is the importance of acid-free paper in poster printing?

Acid-free paper is essential to poster printing as it preserves vivid colors and prevents discoloration over time, ensuring your poster remains vibrant.

What is the difference between digital and offset printing?

Digital printing is ideal for short-run production and when a rapid turnaround is necessary, while offset printing is better suited to large-run production and when a higher-quality result is desired.

Clash Graphics Print Shop Atlanta Flyer Printing

2233 Peachtree Rd NE Ste 202 AtlantaGA 30309
(678) 235-3464

To view the original version on Clash Graphics, visit: https://www.clashgraphics.com/printing-tips/standard-poster-sizes-guide/

Monday, May 29, 2023

Types of Printers - Pros, Cons, and Uses

Need help determining what type of printer will best serve your business needs? Knowing what types of printers are available will help you acquire the right one for your printing volume and quality.

types of printers print press run

clashgraphics.com gathered information about printer types, their advantages and disadvantages, and their specific uses.

Different Types of Printers

Printers are an essential component of modern-day offices and homes. They are available in various types and sizes, each designed to fulfill different printing needs. Computer printers have evolved, with the most common types of printers are inkjet, laser, solid ink, continuous ink, LED, dot matrix, and A3 printers. Consider the following printer types, their principal use, advantages, and disadvantages:

1. Inkjet Printers

inkjet-printer

Inkjet printers utilize ink cartridges to create images and text on paper. They are ideal for printing high-quality images, photos, and color documents. Inkjet printers are used in homes and small offices for printing documents, graphics, and photographs. They are very affordable and easy to use.

Advantages

  • Affordable price
  • Produces high-quality printing
  • Can print on various paper types, including photo paper
  • Excellent for printing images and graphics

Disadvantages

  • Ink cartridge replacements can be expensive
  • Ink may smudge on certain paper types
  • Ink may fade with time and light exposure

2. Laser Printers

laser printer

Laser printers use toner cartridges to print text and images on paper. They are ideal for printing large volumes of office documents quickly and efficiently. They are used in offices and businesses that require high volumes of printing.

Advantages

  • Fast printing speed
  • High-quality text printing
  • Lower cost per page than inkjet printers
  • Good for printing documents

Disadvantages

  • Expensive initial cost
  • Capable but not suitable for printing images and graphics
  • Limited paper types, cannot print on glossy photo paper

3. Solid Ink Printers

Solid ink printers utilize solid ink sticks instead of liquid ink cartridges. They are ideal for printing high-quality color documents, graphs, and images. They are used in businesses that require high-quality color printing.

Advantages

  • High-quality color printing
  • Cost-effective for printing high volumes of color documents
  • Excellent for printing images and graphics

Disadvantages

  • Elevated initial cost
  • Not suitable for black-and-white documents
  • Limited paper types, cannot print on glossy photo paper

4. Continuous Ink Printers

Continuous ink printers use sizable ink tanks instead of smaller ink cartridges. They are ideal for printing documents and images in high volumes. They are typically used in businesses that require a high volume of printing.

Advantages

  • Low cost per page
  • Can print high volumes of documents and images
  • Excellent for printing images and graphics

Disadvantages

  • Expensive initial cost
  • Ink can dry out if not used regularly or properly
  • Limited paper types, cannot print on glossy photo paper

5. LED Printers

LED printers use LED technology to produce images and text on paper. They are similar to laser printers but are more affordable and use significantly less power. These printers are ideal for printing text documents quickly and efficiently.

Advantages

  • Rapid printing speed
  • Significantly low energy consumption
  • Lower cost per page than laser printers

Disadvantages

  • Limited paper types, cannot print on glossy photo paper
  • Not recommended for printing high-quality images and graphics
  • Elevated initial cost

6. Dot Matrix Printers

dot matrix printer

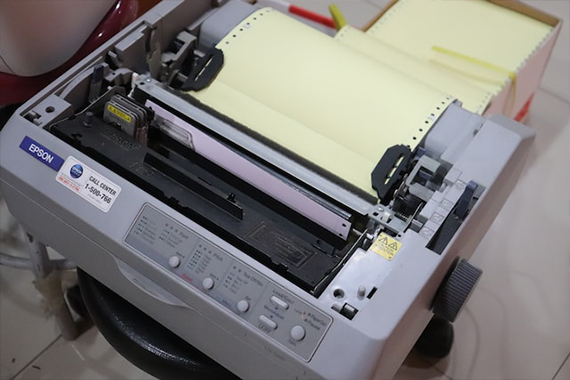
Dot matrix printers utilize pins that strike an ink ribbon, creating dots that form images and text on paper. They are ideal for printing multi-part forms and invoices. They can print on continuous paper and make clear and legible carbon copies.

Advantages

  • Prints on multi-part forms and carbon copies
  • Affordable price
  • Long-lasting, reusable ink ribbons
  • Suitable for printing in harsh industrial or factory environments

Disadvantages

  • Low-quality printing
  • Slow printing speed
  • Limited resolution
  • Inconveniently loud and noisy

7. A3 Printers

A3 printer

A3 printers are designed to print on larger paper sizes (up to 11 x 17 inches). These printers are ideal for producing large documents, posters, and brochures. They are typically used in offices, graphic design studios, and print shops.

Advantages

  • Prints on larger paper sizes
  • Ideal for printing posters and large or oversized documents
  • High-quality printing
  • Suitable for printing marketing materials, like brochures

Disadvantages

  • Elevated initial cost
  • Significantly larger size and heavier weight than standard printers
  • Consumes more ink and toner than standard printers
  • Limited paper types, cannot print on glossy photo paper in several models

Each type of printer has advantages and disadvantages, and choosing the right one for your needs depends on your business niche requirements. Consider factors like the document types you will be printing, the printing volume you will be doing, and your budget when selecting a printer.

Printer Types

The future of printing will be exciting, but in this article you discovered the different types of printers, pros and cons, and how they are best suited for office use.

Determining which printer type best suits your business’s needs will help you produce the printed material you require more quickly and efficiently.

Not acquiring the right printer for your office will leave you incapable of producing high-quality and accurate printed material to meet your needs.

Sources:
kb.iu.edu/d/agta
codingmarkingdigest.org/solutions/continuous-inkjet-printer-advantages-and-disadvantages/
atikaschool.org/kcse-computer-studies-questions-and-answers-836310/state-advantages-and-disadvantages-of-laser-printers
ledlights.org/FAQ/What-is-an-LED-Printer.html
lerablog.org/technology/hardware/which-printer-should-i-buy-inkjet-laser-or-led/

Clash Graphics Print Shop Atlanta Flyer Printing

2233 Peachtree Rd NE Ste 202 AtlantaGA 30309
(678) 235-3464

To view the original version on Clash Graphics, visit: https://www.clashgraphics.com/printing-tips/types-printers-pros-cons-uses/

Friday, April 14, 2023

Gang Run Printing - Definition, Advantages, and Disadvantages

Don't understand gang run printing, and need help determining a more economical way to get your printing needs fulfilled? Learning the practicality, advantages, and disadvantages of gang run printing will enable you to get the products you need quickly and inexpensively.

Gang run printing produces consistent high quality prints

clashgraphics.com gathered information about the definition, advantages, and disadvantages of gang run printing and how it makes economic sense for your project.

What is Gang Run Printing?

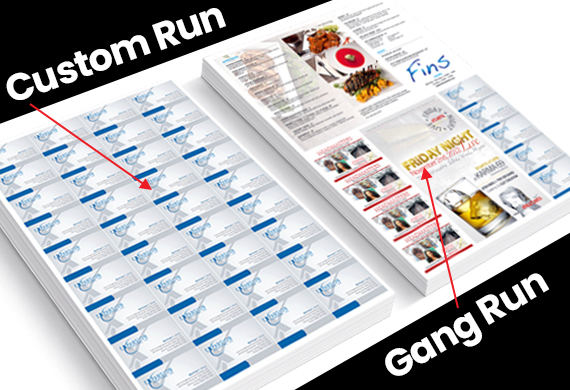
Gang run printing (combination printing) is a process in which multiple print jobs are combined on a large single sheet of paper. This method aims to reduce printing costs by sharing the setup costs across multiple jobs. The process involves using a large sheet of paper, placing numerous designs, then after printing, cutting each job down into its correct size.

Gang run printing is used for various printed products, including business cards, flyers, brochures, postcards, etc.

Benefits and Limits of this Businesses Printing Practice

While the concept of gang run printing is a brilliant way to economize paper, time, setup efforts, and printing costs, it comes with its limitations. When you require specific paper weight, ink color, etc., the gang run process may not serve your needs. There are some trade-offs, so if you are considering gang run printing in Atlanta, understand the following advantages and disadvantages:

Advantages of Gang Run Printing

Among the printing processes available, gang run printing may be the most efficient and economical option. Gang run printing advantages include:

Cost-Effective - One of the most significant advantages of gang run printing is its cost-effectiveness. Since setup costs are shared among multiple print jobs, the overall cost of paper, ink, and printing is significantly reduced. This makes gang run printing an ideal option for customers requiring large print quantities without exceeding their marketing or advertising budget.

Fast Turnaround Time - With gang run printing jobs, the turnaround time is significantly quicker as multiple print jobs are combined in a single print run. This means the prints are produced faster, cut, and delivered to the customer in a much shorter time frame.

Note: Customers can choose the delivery time for their job. Most printing companies can offer same day printing, or more than 7 day delivery (typically, the longer the lead time, the lower the price). More lead time means greater opportunities for your printer to optimize costs by doing a gang run or optimizing delivery routes and schedules. The increased cost-efficiency gained from this technology is transferred to the customers as discounted pricing.

Flexibility - Gang run printing offers significant flexibility for the design and layout of prints. Multiple designs can be combined or arranged on a single sheet, meaning businesses can produce multiple prints without having to order separate print runs for each design.

Quality Prints - Another advantage is its consistently high-quality prints. The process uses high-quality paper and cutting-edge printing technology, and although the cuts are not exact,  the paper and print qualty are consistent - as they are produced in one single run.

Gang run printing increases turn around time and reduces costs

Disadvantages of Gang Run Printing

While gang run printing presents powerfully compelling advantages, it is not the ideal option for every print job. Consider the following disadvantages before committing your resources to this printing process:

Limited Customization - One of the more significant disadvantages of gang run printing is its restricted customization options. Since multiple print jobs are combined on a single sheet, each print job must conform to a specific set of requirements, including:

  • Paper weight, texture, and color
  • Ink type and color
  • Printing technology

This means projects requiring highly customized printing may not find gang run printing suitable for their specific needs.

Inconsistent Color Quality - Another disadvantage of gang run printing is its potential to produce inconsistent color or tone quality. With multiple print jobs combined on a single sheet, there is a significant risk that the color quality and consistency may vary from one print to another. This is especially true when different print jobs use varying color schemes or when the applied printing technology is of a lower standard.

Note: For projects that require specific color matching, or pantone colors for example, gang run printing will not satisfy your needs.

Limited Paper Choices - Gang run printing is significantly limited for paper choices. With multiple print jobs combined on a single sheet, individual print jobs must conform to a specific paper weight, thickness, and quality. Businesses requiring particular types of paper may not find gang run printing suitable for their needs.

Uses of Gang Run Printing

In this article, you discovered what gang run printing is, its advantages, and disadvantages when you require fast, high-quality, and inexpensive print jobs.

Knowing what gang run printing is and its advantages and disadvantages will help you make informed decisions when printing your business cards, postcards, flyers, door hangers, etc.

Lacking knowledge of gang run printing may leave you paying more or not getting the product you planned or needed.

Sources:

d3.harvard.edu/platform-rctom/submission/raksul-japanese-uber-for-printing/
idealabs.byu.edu/publications/2014HThesisDFullmer.pdf

Clash Graphics Print Shop Atlanta Flyer Printing

2233 Peachtree Rd NE Ste 202 AtlantaGA 30309
(678) 235-3464

To view the original version on Clash Graphics, visit: https://www.clashgraphics.com/printing-tips/gang-run-printing-definition-advantages-and-disadvantages/

Friday, March 17, 2023

How to Write a Book

Researching or preparing to write a book? Understanding how to organize and get your ideas on paper will help you develop and tell your story in an appealing and marketable way.

Writing a book requires plotting an idea and developing characters

clashgraphics.com gathered information and tips to create a step-by-step guide on how to write a successful book that keeps you focused and maximizes your creativity.

Step 1. Why

Define what you want to write about. It may be your own story, a personal struggle with relationships or addiction, a profound or revealing experience, a new perspective on a significant or old issue, or a story from your imagination. Whatever you choose, people adore stories, and we've been learning from them for centuries.

Before you start writing, typing, or overthinking about your book, be honest with yourself about your reasons for writing it. Consider the following:

  • Are you seeking riches and fame?
  • Is writing a necessity for advancing your career?
  • Do you dream about seeing your name printed on a book cover?
  • Do you have a great story that you want to share with the world?
  • Can you solve a problem for a portion of the population?
  • What is my book about?
  • Why is the story interesting or important?
  • Who will want to read my book?

Once you’ve defined your writing subject, it’s time to set yourself up for success.

Step 2. Set up Your Workspace

Writing a book requires working in a space without distractions

Successful writers work best with minimal distractions and easy access to materials and references they may need. Also, make sure the location you select works with your writing medium. If you want to write on a desktop or laptop, make sure you have a sturdy desk, adequate lighting, and an easily accessible power connection.

Tip: Pick a comfortable, sturdy, and supportive chair. You may be sitting for hours, and an uncomfortable chair can become a significant (and painful) distraction.

Step 3. Outline Your Story

The writing process is not fixed, but accomplished writers spend considerable time outlining their books before physically writing them. Outlines can be highly detailed chapter outlines or simple guides in which sections of the book are plotted. Regardless of your method, you must have a roadmap or guide for your writing.

Step 4. Research Your Idea

If you’re writing a nonfiction book, you must deeply research your subject matter and location to write about it effectively. Even a fictional work should be grounded in some degree of reality. For example:

  • A sci-fi adventure (set in space) will be more effective and relatable if the physics and technology draw insights and definitions from reality.
  • If you’re writing a crime story, research how police typically investigate crime scenes and protect the evidence chain of custody while seeking their perpetrator.

Tip: Interview people associated with your topic. An astronaut can give you valuable insight into what someone experiences during takeoff or weightlessness, while a police detective can help you understand the importance of preserving a crime scene.

Step 5. Establish a Writing Routine

Writing your rough draft requires consistent routines and productive writing habits. Consider the following:

  • Treat writing like a full-time job
  • Establish daily word count targets
  • Schedule writing time and put it on your calendar
  • Set alarms to help you structure start, stop, and break times

Tip: Set your writing goals based on your speed and deadlines, and avoid adjusting them after you’ve set them.

Step 6. Write Your First Draft

Writing a book requires writing a first draft

Write your first draft without worrying about editing. Focus on writing something now, and figure out if it’s a keeper or how it needs to be polished later. To finish a book, you’ll have to get used to writing fast and leaving the editing for later.

Note: Be prepared to spend as much time editing your book as you did writing it, so leave the editing part for later. Focus on getting your story written, and don’t worry about spelling or grammatical mistakes.

Tip: Whenever you experience writer’s block or feel stuck, try referring to your notes, outline, or research to get inspired again.

Step 7. Solicit Feedback

Requesting feedback on your book, starting early and from as many reliable sources as possible, is crucial. Collect their feedback and apply relevant suggestions to the chapters they’ve read and wherever else they may apply.

Tip: Avoid letting your ego keep you from absorbing good or critical feedback. Your friends and fellow writers are trying to help you, not offend you.

Step 8. Edit Your Work

Good books go through several rounds of editing and revisions. You can go through the editing process yourself or ask a qualified friend, fellow writer, or a professional editor to help. Whichever path you choose, you need an honest, ruthless perspective on your writing so you can know what needs re-tooling.

Step 9. Write the Second Draft

The second draft is an opportunity to apply more extensive revisions and edits. It’s also an opportunity to consider more significant, overarching questions that can only be answered after completing your first draft. Consider the following:

  • Does your book have a consistent tone?
  • Is there an overarching theme that needs developing and strengthening?
  • Are there weak parts of the book that can be entirely omitted?

Your second draft provides an opportunity to address more granular questions; Does the book have an appealing opening hook? An impactful conclusion?

Step 10. Publish Your Book

Writing a book requires several drafts until publishing

Now that you’ve finished your final draft, it’s time to publish. Self-publishing is easier than ever with the popularity of online marketplaces and e-readers like the Kindle. If you prefer the traditional publishing route, you can submit a literary proposal to a publishing house (ideally through a literary agent).

Once you’ve successfully published your book, sit back, relax, and start considering ideas for your next book.

Writing a Book

In this article, you discovered essential information, tips, and steps to help you stay focused and on track to successfully write and publish your book.

Knowing how to structure your ideas and workspace will help eliminate annoying distractions while maximizing your writing potential and creativity.

Your lack of structure and preparation will likely result in a lost train of thought, poor writing, unfinished work, and your failure as a writer.

Sources:
northcentralcollege.edu/news/2021/05/26/how-write-and-publish-book
students.aiu.edu/submissions/profiles/resources/onlineBook/Z3G9E6_How%20to%20write%20a%20book%20AIU.pdf
writing.ku.edu/writing-process

Clash Graphics Print Shop Atlanta Flyer Printing

2233 Peachtree Rd NE Ste 202 AtlantaGA 30309
(678) 235-3464

To view the original version on Clash Graphics, visit: https://www.clashgraphics.com/printing-tips/how-to-write-a-book/

Thursday, February 16, 2023

7 Essential Graphic Design Tools and Programs

Need help determining which tools you will need as a graphic designer? Knowing which tools to invest your resources and time will help you produce stunning graphic work for your projects and clients.

Essential graphic design tools include software programs and personal skills

clashgraphics.com gathered information on seven essential graphic design tools to help you become a better graphic designer while producing high-quality, eye-catching graphic designs.

Basic Design Tools

Traditionally, pencils, compasses, rulers, and drawing triangles have been considered standard design tools and have been used to characterize design and designers. While these tools are still relevant in manual design work, technological advances have radically altered how today’s designers develop projects from concept to finished work. To be successful, graphic designers in today’s competitive digital market should be familiar with the following tools:

1. Adobe Photoshop

Essential graphic design tools and programs include photoshop

Photoshop is an image creation, graphic design, and photo editing software developed by Adobe. This dynamic software provides multiple built-in image editing features for pixel-based images, raster graphics, and vector graphics. Adobe Photoshop first came to market in 1988.

Photoshop can be challenging to learn and use, and (as for design software) it is not always the most intuitive or user-friendly. Additionally, Photoshop is proprietary software, which means it is not available for free but can be used during a 7-day free trial.

For more information on downloading this program and prices, visit adobe.com/products/photoshop.html

2. Adobe Illustrator

Essential graphic design tools and programs include adobe illustrator

Adobe Illustrator is among the industry-leading graphic design tools that let you design practically anything imaginable (logos, icons, graphics, and illustrations) and customize your work with professional-level precision.

Adobe Illustrator is an excellent tool to use. It is user-friendly, has a great selection of features, and is available on multiple platforms. You can start using this tool during a 7-day free trial, but like Photoshop, Illustrator is also proprietary software.

For more information on downloading this program and prices, visit adobe.com/products/illustrator.html

3. Adobe InDesign

Essential graphic design tools and programs include adobe indesign

Used by graphic designers, publishers, marketing professionals, and artists, InDesign is desktop publishing software for designing flyers, brochures, magazines, newspapers, books, and more. Finalized projects created with this software can be shared in digital and printed formats.

InDesign is an excellent, user-friendly software that is relatively easy to master. You can download and start using this design tool during a 7-day free trial, but like other Adobe products, it is proprietary software.

For more information on downloading this program and prices, visit adobe.com/products/indesign.html

4. Adobe After Effects

Essential graphic design tools and programs include adobe after effects

After Effects is acclaimed for its motion graphics tools, which designers and animators use to create 2D and 3D animations.

Adobe After Effects is a powerful and feature-rich animation and effects application widely used by professionals in the film and television industry. This professional-grade program is challenging to learn without help but is worth the effort. You can start using this dynamic tool during a 7-day free trial, but like other Adobe products, it is also proprietary software.

For more information on downloading this program and prices, visit adobe.com/products/aftereffects.html

5. Canva

Essential graphic design tools and programs include canva

Canva is a user-friendly, easily accessible design tool for your phone or tablet, which makes creating custom graphics a breeze. It provides readymade templates, as well as a free platform, and offers additional features with paid subscriptions such as Canva Pro and Canva for Enterprise.

Not only can you enhance your social media content, but you can also use Canva to design flyers, presentations, invitations, posters, brochures, and business cards. Plus, you can purchase physical products and have them printed and shipped.

For download and pricing information, visit canva.com

6. Sketch

Essential graphic design tools and programs include sketch

This software is designed to help businesses design icons and vector graphics, seamlessly collaborate with team members, and modify a design’s topography or fonts through a unified platform. The application allows employees to automate workflows, give and receive feedback on designs, and share prototype links with stakeholders.

Sketch is intuitive and easy to use, and the software’s plugins make work effortless and seamless. It has multiple learning resources online, shortening the learning process. If your work is collaborative, the only drawback is that team members must use IOS to interact.

You can download Sketch for free as a student or educator. With access to the design platform, you get a set of powerful tools, including a Mac app, web app, and iPhone app (for design, collaboration, and prototyping). You also have the option to switch to a subscription.

For download and pricing information, visit sketch.com

7. Figma

Essential graphic design tools and programs include figma

Figma is a powerful online design tool that helps you create anything (websites, applications, logos, and more). Learning to utilize Figma allows you to work with and develop User Interface Design and User Experience Design.

This software design tool is easy for anyone to use (on any platform) and allows teams to share their design work and libraries seamlessly. Figma is an excellent free tool for designers but it is not free forever. There is a free trial period; after it expires, you will need to pay for a subscription.

For more information on downloading this versatile program and its prices, visit figma.com/graphic-design-tool/

BONUS: Skills All Graphic Designers Need

Graphic designers unify art and technology, so they need knowledge of design principles and software proficiency. Because they often work directly with customers and colleagues on multiple projects, they also need essential “soft skills” like communication and quick problem-solving. Consider the following skills to be crucial for a successful graphic designer:

Creativity - Graphic designers are frequently tasked with developing new and unique ideas.

Communication - You must understand that graphic design is visual communication, so communication skills are fundamental to a graphic designer’s work.

Strategy - Graphic designers must be strategic thinkers. They must consider how design elements work together and how to best convey meaning while sticking to design parameters.

Problem-Solving - Think of a design brief as a problem - A client needs to communicate a message, and the proper graphic design work will solve their problem.

Time Management - Graphic designers often work on multiple projects simultaneously and may be confronted with different deadlines from several clients.

Essential graphic design skills include time management

Note: Drawing skills are not necessarily required for graphic design jobs. Most often, graphic designers use design software, so efficiency in the software is more crucial than improving one’s drawing skills.

Graphic Design Tools

In this article, you discovered information about several powerful graphic design tools to help you excel as a graphic designer, producing stunning, high-quality work.

Your proficiency in graphic design software tools will help you create better designs, communicate seamlessly with coworkers, and exchange immediate design feedback with your team.

Failing to become proficient with graphic design software and other programs will prohibit growth opportunities in your career as a graphic designer.

Sources:
artinstitutes.edu/about/blog/5-graphic-design-software-options-for-beginners
online.maryville.edu/blog/must-have-tools-for-graphic-designers/
sopa.tulane.edu/blog/6-software-master-while-earning-graphic-design-degree

Clash Graphics Print Shop Atlanta Flyer Printing

2233 Peachtree Rd NE Ste 202 AtlantaGA 30309
(678) 235-3464

To view the original version on Clash Graphics, visit: https://www.clashgraphics.com/printing-tips/7-essential-graphic-design-tools-and-programs/

Wednesday, January 11, 2023

Planning a Family Reunion

Need help organizing an inclusive, diverse, and fun family reunion? Knowing how to plan your family reunion and events in advance will help you keep everyone on the same page, well-informed, and more inclined to have a good time at the reunion.

Planning a family reunion can include taking portraits

clashgraphics.com gathered essential planning and organizational information to help you plan a successful family reunion with abundant photo opportunities, games, events, traditional family recipes, and refreshments for all ages.

Family Reunion Planning

As you start your family reunion planning process, it is crucial to remember how these reunions can:

  • Reinforce common family bonds
  • Educate and connect the next generation to their family’s past
  • Give continuation to stories about the family history
  • Keep recipes passed down over generations alive
  • Regenerate brother and sisterhoods
  • Reinvigorate appreciation of life's unique but parallel journeys

Family reunions help young adults and children form solid identities about who they are and where they come from. Family reunions typically last only a day or two. So, by the time you have refreshed your family bonds, it's time to say goodbye. Consider the following when planning your family’s reunion:

1 - Assemble a Reunion Planning Committee

Gather a planning committee ranging in age and income; this will ensure there are activities that everyone can enjoy and afford. You want a diverse committee representing the youth, families with children, and seniors. People may feel hurt and neglected when they are left out. An added benefit to including younger generations in the reunion’s planning will prepare them to eventually take it over in the future. Committee members should consist of:

Committee Chairperson - Coordinates all reunion-related subjects and follows up with other committee members to ensure delegated tasks are completed on time.

Finance Director - Handles the reunion checking and savings accounts, maintains a detailed budget, and makes approved purchases.

Correspondence Director - Communicates with family members (cards, notes, emails, group texts, maps, menus, etc.).

Lodging Liaison - Ascertains accommodations for traveling family members and negotiates group rates.

Food Director - Communicates with the caterer and handles the potluck. This person should be knowledgeable of food allergies and which family members have food restrictions or allergies.

Entertainment Director - Organizes activities and events for all age groups (inflatable jumpers, sack races, scavenger hunts, talent shows, trivia games, etc.).

RSVP Director - Confirms and tracks who’s attending.

Welcome Committee - Prepares and distributes name tags, agendas, wayfinding, and signage. These individuals operate the registration booth, distribute shirts and keepsakes, help family members mingle, and serve as the first faces of the reunion.

Tip: Create and distribute a bio sheet with a photo for each committee member, so everyone knows who did what to make the reunion happen.

2 - Collect Input from Family Members

The Correspondence Director should distribute questionnaires (6 to 9 months in advance) to family members to collect their input on when, where, and what they want to be included in the reunion’s activities.

Tip: Email, social media, and texting apps can help people stay in touch between reunions and build excitement for upcoming events. Payment apps like PayPal or Venmo make it significantly easier to handle finances, including allowing people to contribute over time. Use Zoom or other streaming apps during the reunion’s events. This will help you include those who can’t attend in person.

3 - Determine a Reunion Planning Center

Planning a family reunion can include assembling a committee

A reunion generates paperwork: Even with subcommittees, the reunion committee chairperson needs copies of crucial information, like vendor contracts, updated registration data, and lodging details.

The chairperson might use a home office and keep everything in a simple file folder or separate folders for each committee (in a file box).

4 - Reunion Finances

Like it or not, your reunion will cost money. You’ll need to establish a budget and ask your family to contribute. You will need money for mailings, producing signage, printing shirts, and keepsakes, and venue and catering deposits.

You could craft a letter to each family member describing the upcoming reunion and asking for a financial contribution. Let them know how their money will be used.

Tip: Give your family members monthly payment options for more-expensive activities like cruises or destination reunions. You can also ask individuals to donate specific services like printing or graphic design work as their contribution.

5 - Develop a Theme

Themes generate enthusiasm for your reunion and provide a guide for food, attire, decorations, memorabilia, and activities. Some popular themes include:

  • The Roaring 20s
  • Country Western
  • Decade-based 50s, 60s, 70s, 80s
  • Anniversary (the 20th annual reunion, 50th wedding anniversary, etc.)
  • Heritage (Hawaiian, Irish, Italian, Mexican, etc.)

Tip: Your reunion’s theme should be incorporated in all communications, banners, signs, t-shirts, etc.

6 - Design A Reunion Theme, Logo, and T-Shirts

You can brand your reunion by designing (or commissioning a design) that represents your family, the reunion’s theme, and any significant happenings that may have influenced or shaped your family’s course.

Tip: Consult the graphic designer at the print shop you select to communicate your theme, colors, dates and location of the reunion. to print the reunion’s materials 

7 - Plan Activities for All Ages

Fun activities are essential for getting relatives reacquainted after being out of touch for years or decades. Consider including some of the following:

Show-and-Tell - Ask everyone to bring a family heirloom, photo, or other interesting memorabilia and share the story behind it.

Family Recipe Bake-Off - Publish handed-down recipes and bake-off rules in your reunion’s newsletter. At the event, let the most senior generations judge whose food tastes most like the original.

Planning a family reunion can include using family recipes in cooking and baking competitions

Family Trivia - Gather entertaining information about ancestors and quiz the reunion attendees. Remember to present prizes to the winners.

Genealogy Workshop - Ask family historians to bring their historical research and compare notes, or take the group on a research trip to the library.

Camera Fun - Leave disposable cameras on tables. Everyone loves them, and you’ll have plenty of reunion photos to share afterward.

Baby Photo Guessing Game - Smile and laugh at everyone’s baby photos as you try to figure out who each photo belongs to. The activity can include laying the photos out and asking guests to pin them on the right family tree branch.

Tip: Ensure that everyone has the opportunity to participate in the games’ setup or playing, so no one feels left out.

8 - Create Reunion Souvenirs

Let family members take home reunion souvenirs; you could offer any of the filling items:

Family Directories - These should include updated addresses and contact information.

Family History Book - Let the family know that you will assemble a history book (available at the reunion) and ask for copies of documents, newspaper clippings, recipes, stories, or old pictures. Assemble a “proof” book and have it copied and bound. You can sell the books at cost and deliver them at the reunion.

Planning a family reunion can include creating a family history book

Reunion Portrait - A reunion allows you to shoot a family photo while you’re all together. Hire a professional photographer to capture and distribute the portrait after the reunion.

Family Recipe Book - Along with recipes, include photos of the original bakers and stories about their recipes.

Reunion Video - Capturing footage records family discoveries and fun moments created during the reunion. This is ideal for preserving and sharing family interviews or storytelling sessions.

Souvenirs allow family members to reminisce any time between reunions and maintain the motivation to stay in touch throughout the year.

Family Reunions

In this article, you discovered crucial information to help you organize and plan a successful and inclusive family reunion.

Your organizational and planning skills will help you gather your family and offer them a learning opportunity while having fun and making life-long memories.

Not knowing how to organize and plan your family reunion can leave family members left out, cause confusion, affect the overall turnout, and leave family unwilling to participate in future reunions.

Sources:
wisbar.org/NewsPublications/WisconsinLawyer/Pages/Article.aspx?Volume=91&Issue=9&ArticleID=26631
aarp.org/home-family/friends-family/info-2022/reunion-planner.html

Clash Graphics Print Shop Atlanta Flyer Printing

2233 Peachtree Rd NE Ste 202 AtlantaGA 30309
(678) 235-3464

To view the original version on Clash Graphics, visit: https://www.clashgraphics.com/printing-tips/planning-a-family-reunion/